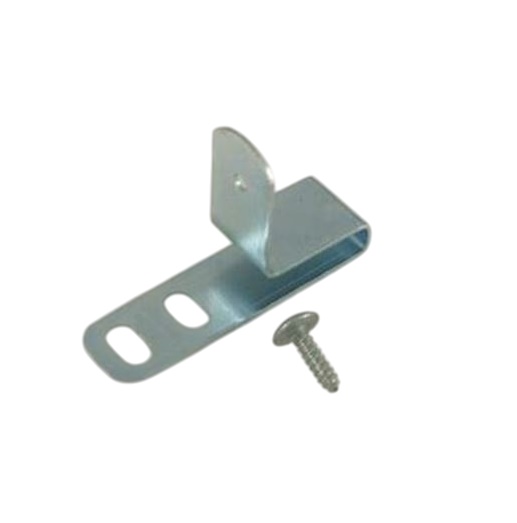

Whirlpool WP9741251 Dishwasher Mounting Bracket
Description
The Whirlpool WP9741251 Dishwasher Mounting Bracket is a vital accessory for securing your dishwasher to the underside of your countertop. It's a metal bracket that typically attaches to the dishwasher frame on one end and attaches to a particular location on the bottom of the countertop on the other end, using a screw to guarantee that the connection is secure. This bracket serves as a necessity for maintaining your dishwasher securely in place while in use. Without correct assignment, the dishwasher could shake overly, inflicting damage to itself, the surrounding cabinets, or even leaks. The mounting bracket holds the dishwasher and reduces noise during washing cycles. This appliance is compatible with an array of Whirlpool, KitchenAid, and Kenmore dishwasher models.
This Part Fits the Following Models
247 models| Manufacturer Name: WHIRLPOOL Product Number: WP9741251 OEM Part Number: WP9741251 Product Description: Bracket |
Choose the best Home Appliance parts and supplies from HnKParts!
Same Day Shipping
Best Quality And Best Price
Wide Range of Inventory
Best Customer Service
Have More Questions or Need Help to Place The Order?
Reach us at (866)723-0907 or [email protected]
Step 2: A putty knife should be utilized at the edge of the front panel, situated near the bottom, to have it carefully detached from the frame.
Step 3: The four mounting screws situated at the upper section of the panel should be extracted using a Phillips-head screwdriver.
Step 4: The panel should be elevated off the machine, ensuring that none of the wires are disconnected.
Step 5: The WP9741251 Whirlpool Mounting Bracket should be identified and detached from the rear of the machine.
Step 6: The current bracket should be inspected for any indications of wear, damage, or deterioration. Should any damage be shown by the bracket, it should be substituted with a new WP9741251 Whirlpool Mounting Bracket.
Step 7: The new bracket should be positioned into the mounting holes and fastened with the screws removed previously.
Step 8: The front panel should be reattached and secured with the four mounting screws.
Step 9: The washer should be reconnected and power restored.
Step 10: A test should be conducted on the washing machine to confirm it operates correctly.
Please remember, these guidelines are served as a general reference and should always be utilized alongside the manufacturer's manual, if accessible.
Customer Reviews
No reviews yet. Be the first to write one!
Write a Review
We strive to provide our customers with a hassle-free and efficient shopping experience. Our shipping policy ensures the timely delivery of your orders and complete customer satisfaction. View More
We are committed to ensuring your complete satisfaction with every purchase. We understand that circumstances may arise where you must return a product or request a refund. If for any reason you are not satisfied, you may return the item(s) according to the terms outlined below. View More
This Payment Policy outlines the terms and conditions governing all payments made for products purchased through our website. By making a purchase, you agree to be bound by this Payment Policy. View More